If you are new to proxies, you may not know how to turn one off. A proxy can offer privacy, security, and access to restricted content, but sometimes, you might need to disable it. For example, when troubleshooting connection issues. Don’t worry if this sounds technical—we’ll break it down into simple steps.
This beginner-friendly guide will walk you through the steps to turn off a proxy on different devices and browsers. We’ll also cover some troubleshooting tips. Let’s get started!
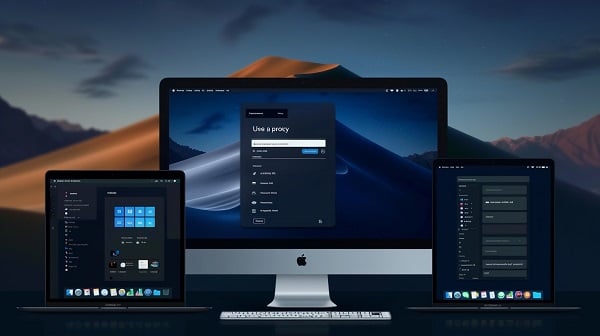
What Is a Proxy and Why Disable It?
A proxy server routes your internet traffic through itself, hiding your IP address and providing benefits like anonymity and access to unavailable content in your region (e.g., a video). But it can sometimes cause problems:
- Slowing down your internet connection.
- Blocking access to certain websites.
- Causing errors when trying to connect to secure sites.
If the above issues, turning off your proxy might be the solution. Don’t worry—it’s easier than it sounds, and we’ll guide you step by step in the later part.
Editor's Tip: Some proxies can log your activity, which could affect your privacy. Please use a quality proxy service if possible.
How to Turn Off Proxy( Main Devices and Browsers)
Steps vary depending on your operating system or browser. Below, we list common scenarios: Windows, macOS, Linux, Chrome, Edge, Firefox, and Safari.
1. Turn Off Proxy on Windows
If you’re using Windows, follow these steps to disable your proxy:
Step 1: Press the Windows Search  , type "Internet Options", and hit Enter.
Step 2: In the Internet Properties window, click Connections.
Step 3: Click LAN settings.
Step 4: Uncheck the box"Use a proxy server for your LAN."
Step 5: Click OK to save changes.
For Windows 11, you can also find this under Settings > Network & Internet > Proxy.
That’s it! If still having issues, please check out the troubleshooting Tips section.
Optional - Reset WinHTTP Proxy
1. Open Command Prompt as administrator.
2. Type: netsh winhttp reset proxy and press Enter
3. To check it worked, type: netsh winhttp show proxy.
2. Turn Off Proxy on macOS
For macOS users, here’s how:
Step 1: Click the Apple menu and then System Preferences.
Step 2: Click Network.
Step 3: Select your active network connection (e.g., Wi-Fi) and click Advanced.
Step 4: Go to Proxies.
Step 5: Uncheck all the proxy options (e.g., Web Proxy (HTTP), Secure Web Proxy (HTTPS)).
Step 6: Click OK, then Apply.
These steps work for macOS Ventura and later; older versions may vary slightly.
Your proxy is now turned off. If any problems, please also read for troubleshooting tips.
3. Turn Off Proxy on Linux
For Linux users:
GUI Method
Step 1: Open Settings, choose Network then Network Proxy.
Step 2: If set to Manual, switch the dropdown to None (or clear all fields).
Step 3: Click Apply system-wide.
Note: These steps are for Ubuntu or GNOME-based systems; check your distribution’s documentation for others (e.g., Fedora or KDE-based systems).
Shell Method
In your terminal, run:
bash
unset http_proxy HTTP_PROXY https_proxy HTTPS_PROXY
For permanence, remove proxy lines from ~/.bashrc, ~/.profile, or /etc/environment.
4. Turn Off Proxy in Google Chrome & Microsoft Edge
Step 1: Open Chrome and click three vertical dots in the top-right corner(vertical in Chrome and horizontal in Edge).
Step 2: Select Settings.
Step 3: Click System, and Open your computer’s proxy settings
Step 4: This will take you to your operating system’s proxy settings (Windows or macOS). Then follow the steps mentioned above.
Note: They use your system’s proxy settings, not their own, so there are no direct proxy settings within themselves.
5. Turn Off Proxy in Mozilla Firefox
Step 1: Open Firefox and click “Open application menu” (three short lines in the top-right corner).
Step 2: Select Settings.
Step 3: Scroll down to Network Settings and click Settings....
Step 4: Select No proxy.
Step 5: Click OK to save.
6. Turn Off Proxy in Safari (macOS)
Step 1: In Safari’s menu bar, click Safari.
Step 2: Select Preferences.
Step 3: Click the Advanced tab.
Step 4: Next to Proxies, click Change Settings.
Step 5: Follow the macOS steps above to disable the proxy.
Environment Variables & Git
Sometimes, proxies are set through environment variables—settings that control how your system or apps (like Git) interact with the internet.
Windows Environment Variables
Step 1: Press Win + R, type “SystemPropertiesAdvanced”, and hit Enter.
Step 2: Click Environment Variables.
Step 3: Under User variables, look for http_proxy and https_proxy. Select and delete them.
Step 4: Click OK.
Git Proxy Settings
If you use Git and suspect a proxy is interfering, remove it with these commands in your terminal:
bash
git config --global --unset http.proxy
git config --global --unset https.proxy
Troubleshooting Tips
Sometimes, turning off a proxy isn’t as straightforward as it should be.
1. Proxy settings are greyed out
This might mean you don’t have administrative privileges. Log in as an administrator or ask your IT team.
2. Can’t save changes
Check if there are any group policies or restrictions in place, especially if you’re on a work or school network.
3. Still can’t connect
After disabling the proxy, clear your browser’s cache or restart your device to ensure the changes take effect.
4. Proxy issue persists
Check your router or modem settings (e.g., via 192.168.1.1)—the proxy might be set at the network level.
If you’re still stuck, consider reaching out to a technical support specialist for help.
Why It’s Important to Turn Off a Proxy When You’re Done
An unneeded proxy can slow your internet, cause errors, or pose security risks. Disabling it gives you:
- Faster, direct access to websites.
- Fewer connectivity issues.
- A smoother browsing experience.
Editor’s Tip: Avoid proxies that log your activity unless necessary.
Final Thoughts
Turning off a proxy is a simple process once you know where to look. Whether you’re using Windows, macOS, Linux, or a specific browser, the steps above will help you disable your proxy quickly. If you run into trouble, don’t hesitate to use the troubleshooting tips or seek additional help.
For more information, you can check our other guides on proxies or contact our support team. Happy browsing!


