
Automate Web Scraping with the Best CAPTCHA Solving Expert - CapSolver
Bypass a variety of CAPTCHA challenges with CapSolver, the most professional solver in bypassing seamless CAPTCHA challenges, making your web scraping more smoothly.
Dec 25, 2025


Manage accounts, boost security, automate tasks, and more. Learn how to set up MuLogin with proxies in this easy-to-follow guide. Plus, unlock a free 3-day trial!
Feeling overwhelmed by juggling multiple online accounts, staying secure, and streamlining your web tasks? Look no further than MuLogin, a comprehensive multi-purpose tool that simplifies account management, enhances online security, and automates repetitive tasks.
This guide dives deep into MuLogin's functionalities, from managing multiple accounts to integrating proxy servers for enhanced security. We'll also walk you through the effortless proxy setup process, ensuring you can leverage MuLogin's power in no time.
Let's delve into the features that make MuLogin so special:
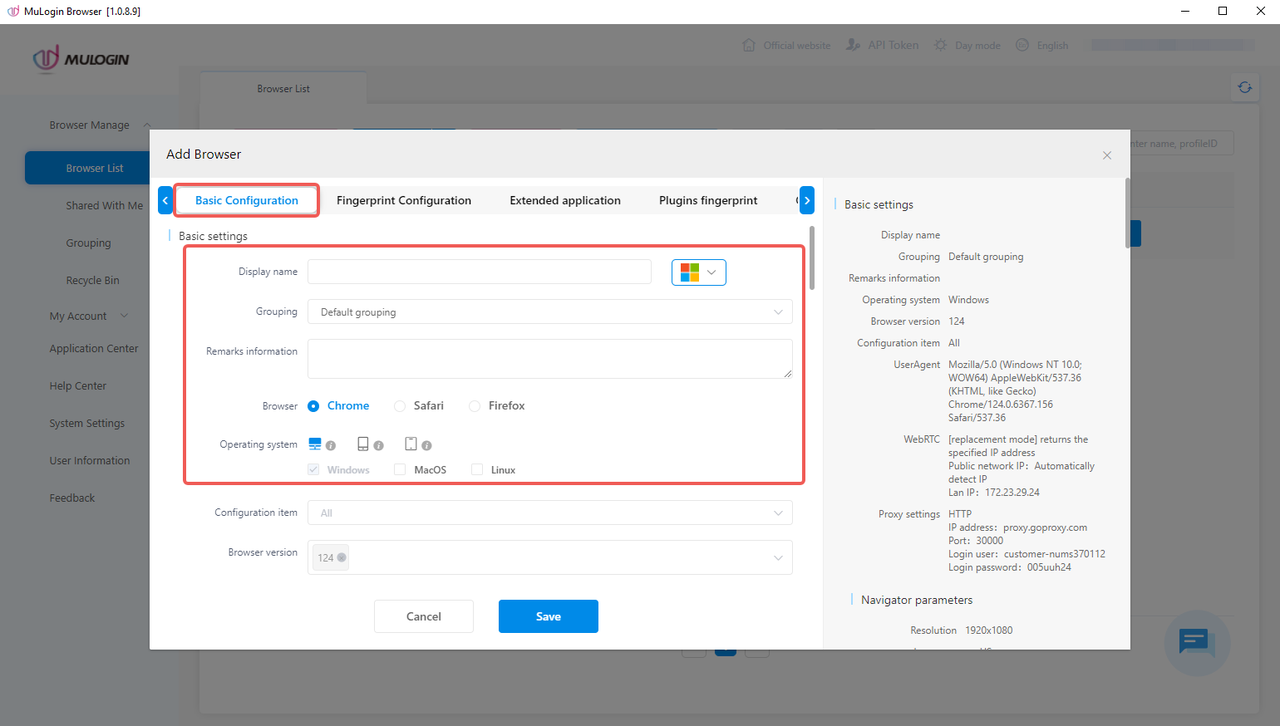
MuLogin empowers users to effortlessly manage multiple accounts across various platforms by leveraging virtual browser technology. Each virtual browser instance acts as a completely isolated environment, ensuring complete separation between accounts and preventing any unwanted linking or detection.
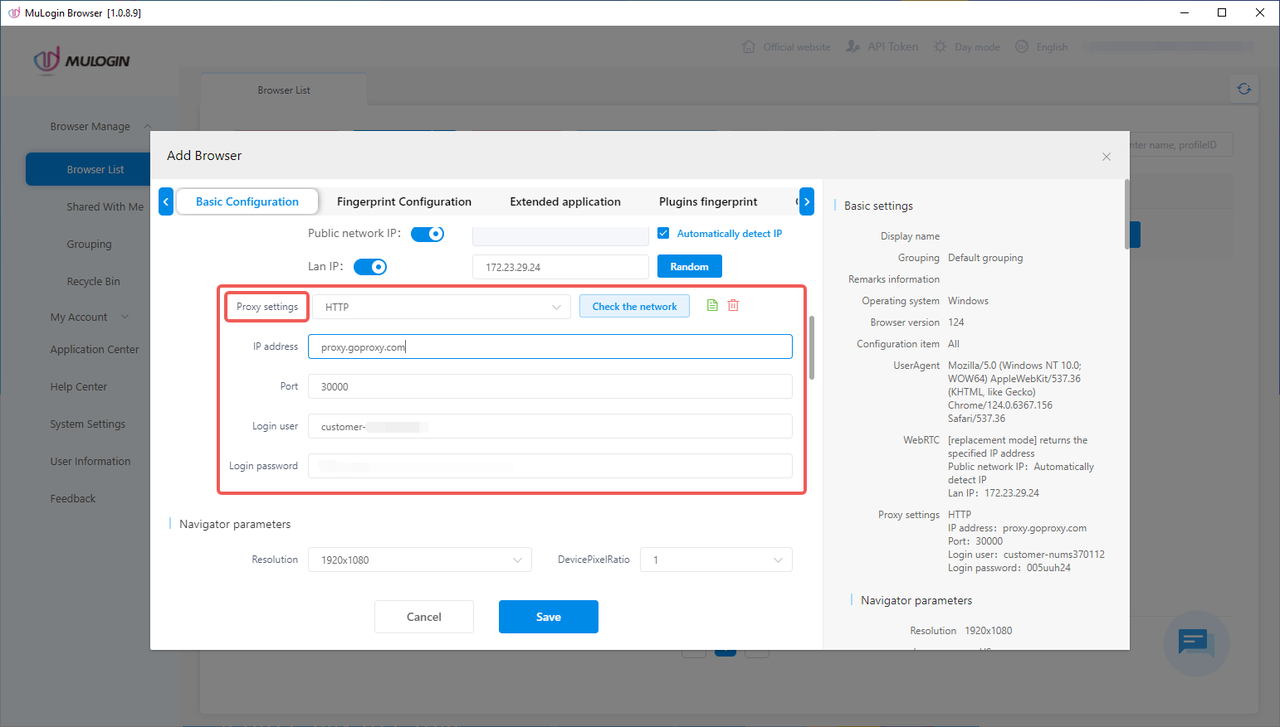
MuLogin supports integration with mainstream proxy IP services, allowing users to configure their own proxy IP without detection. Supported proxy types include HTTP, HTTPS, SOCKS4, SOCKS5, and IPv6.
MuLogin goes beyond simple isolation by allowing you to create truly unique browser fingerprint environments. This means each browser has its own distinct fingerprint, cookies, local storage, and cache files, completely independent of others. This ensures secure multi-account login without detection.
Streamline your workflow by automating repetitive tasks within MuLogin. You can leverage the built-in Local API or utilize popular tools like Selenium and Puppeteer for Mimic to automate tasks with ease. MuLogin empowers you to focus on what matters most, freeing you from tedious manual processes.
MuLogin fosters efficient teamwork through user grouping, flexible account allocation, and real-time data synchronization to the cloud. Share account information and browser profiles seamlessly among team members, fostering collaboration and boosting overall productivity.
MuLogin simplifies the process of using a proxy server with your browsing experience. Here's a clear walkthrough to get started:

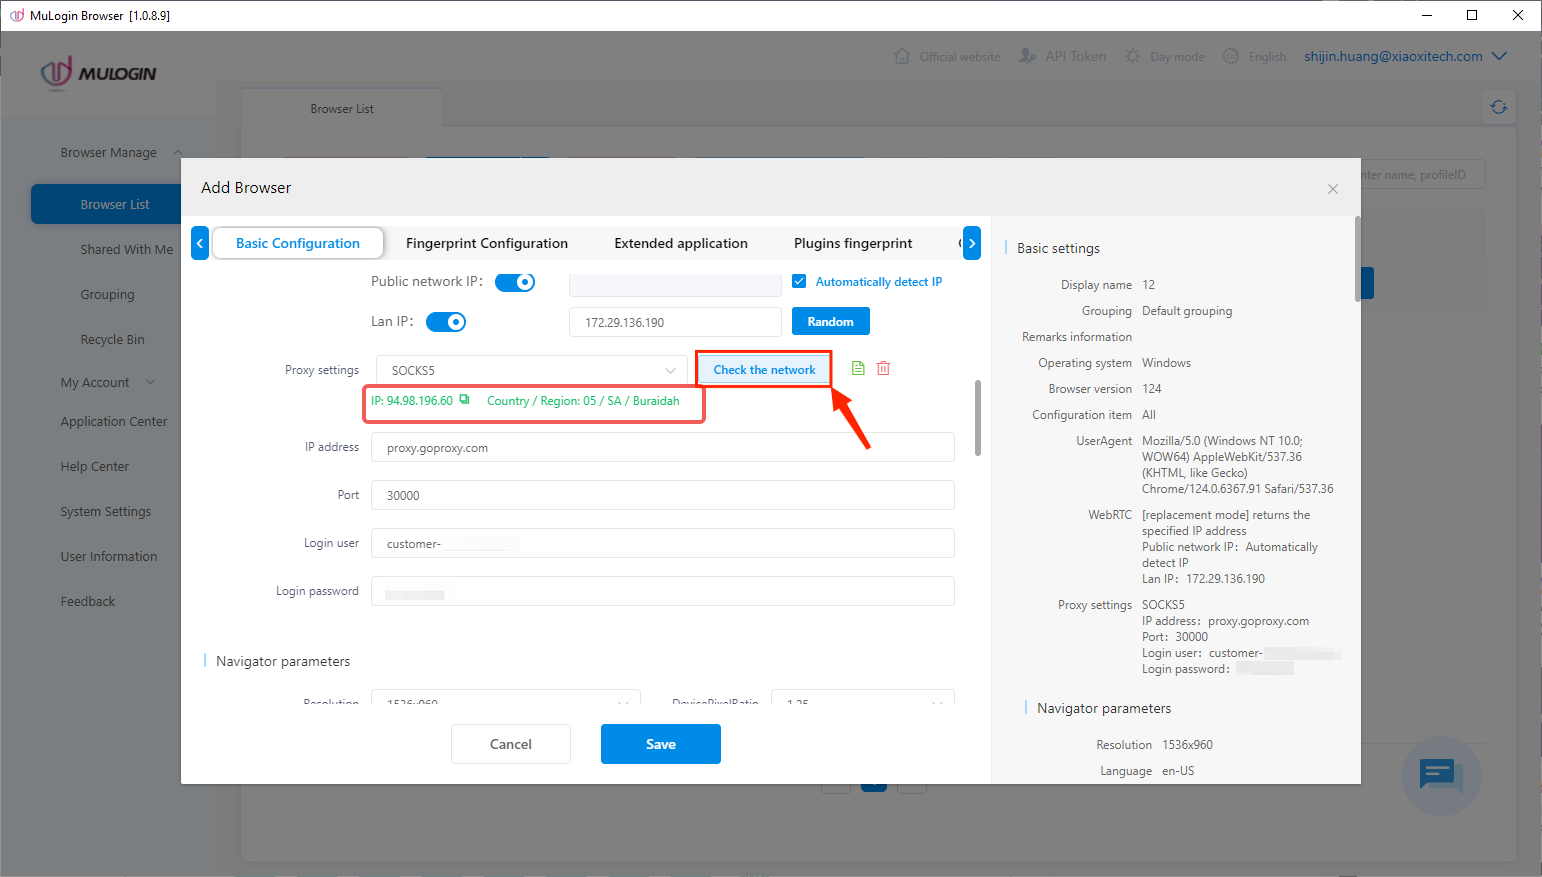
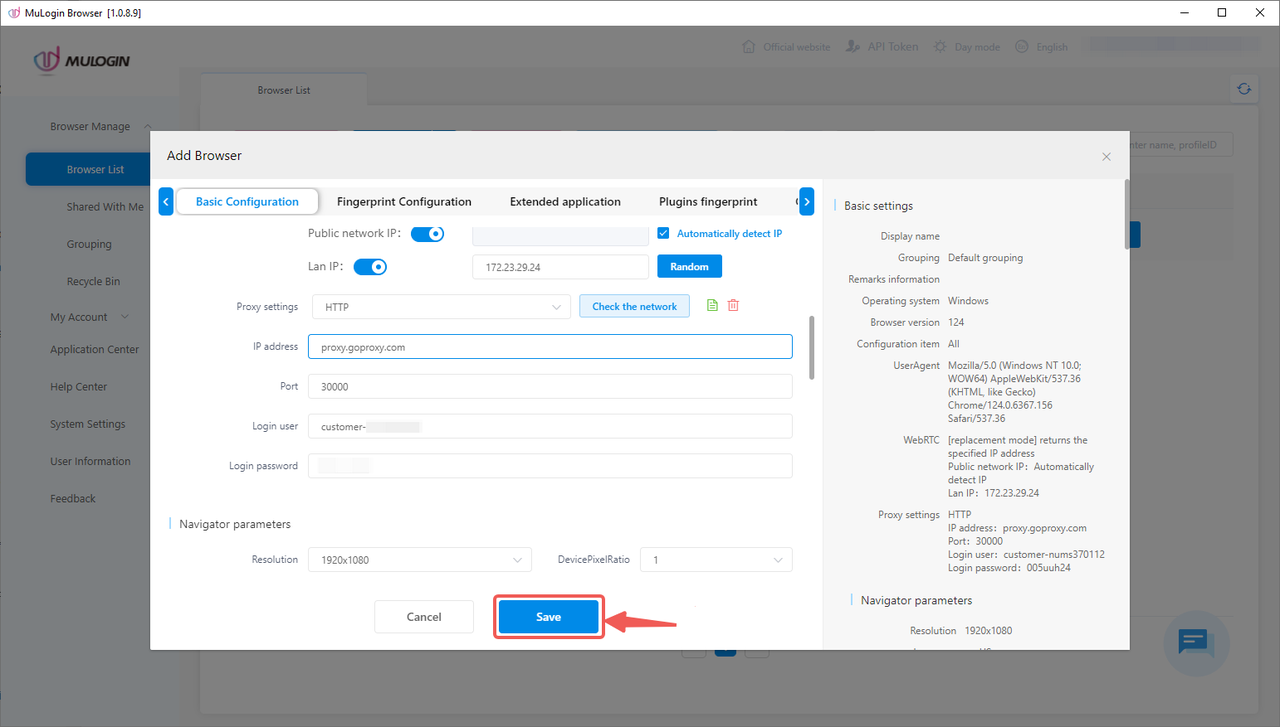
Your MuLogin is now set up to utilize the configured proxy server for all web traffic.
MuLogin offers a premium pricing structure with paid plans catering to different user needs. Plans start at $59 per month for 100 profiles, scaling up to $499 per month for 3,000 profiles. Additionally, MuLogin provides the flexibility of customized plans to perfectly match your specific requirements.
To get a hands-on feel for MuLogin's features, they offer a generous 3-day free trial. During this trial period, you can explore everything MuLogin has to offer without any limitations. This allows you to test drive the software and see if it aligns with your needs before committing to a paid plan.
MuLogin equips you with the tools to conquer the digital world with ease. Manage multiple accounts efficiently, prioritize online security with unique browser fingerprints, and automate repetitive tasks to save valuable time. MuLogin fosters seamless teamwork and collaboration, allowing you to achieve more both individually and collectively.
Ready to experience the freedom and efficiency MuLogin offers? Explore the free 3-day trial and discover how this powerful tool can transform your online journey!
< Previous
Next >


 Cancel anytime No credit card required